

How To Put Bra Cups In A Dress
Yous can fit and sew together your ain bra to get just the fashion, size, fabric, and features y'all want.
For some women, it'due south easy to find bras that fit in styles they like. Merely many others aren't so lucky, spending endless time and money in search of that elusive perfect style and fit. And even if they do detect it, chances are that the style will be discontinued the side by side time they shop. (In fact, it's estimated that 85 percentage of women who wear bras are wearing the incorrect size.) And others of united states are just tired of spending so much coin on so little fabric.
Well, if any of this sounds familiar, y'all'll exist pleased to find out that making your ain custom bra can exist a quick and rewarding project. And rest assured, if you lot're able to cut accurately and sew a precise one/4-in. seam, you can brand a bra.
For the first bra, plan to spend an evening or then. After this one is fitted and finished, y'all'll find that additional bras accept two hours or less. Best of all, once y'all perfect the fit, you lot can continue the design forever, secure in the knowledge that you've solved 1 of a adult female'south trickiest wardrobe problems. Don't miss other Threads techniques like this past purchasing a print subscription which comes with Free access to our tablet editions.
Bra-styling options
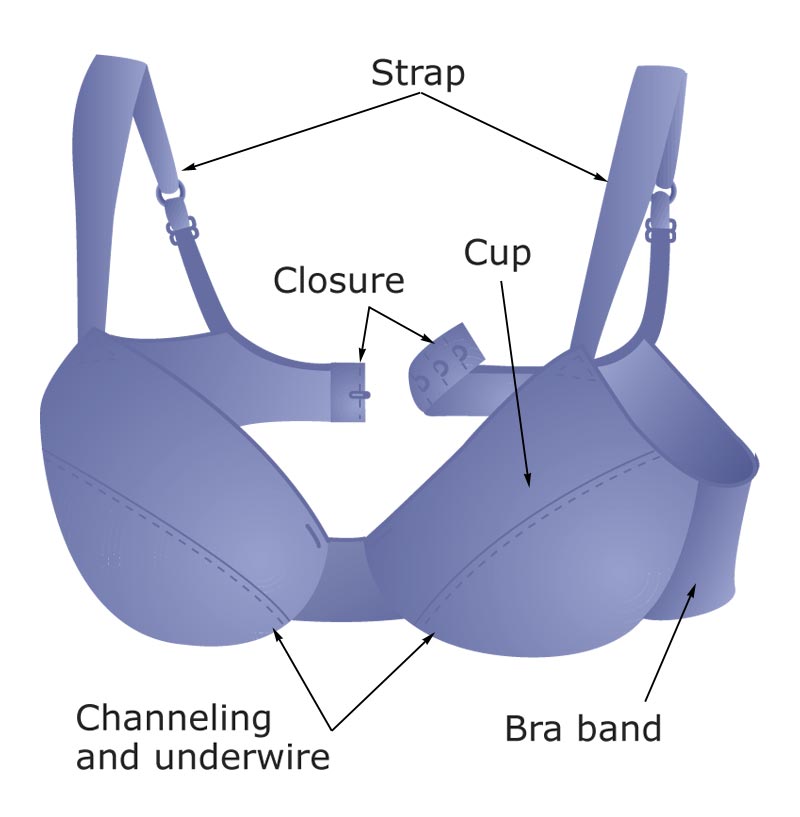
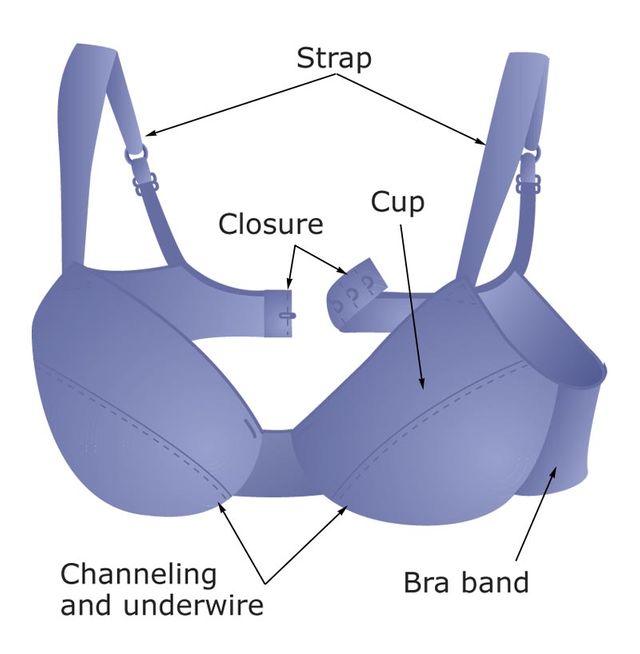
The four elements of a basic bra include a bra band, cups, straps, and a closure (see below). Variations in these key elements determine the bra style. A full-band style, for example, offers the most support; it has a continuous band that extends around the torso, with the cups set into it (see styling options, beneath). A partial-band fashion has a band attached at the sides of the cups, with a centre-front piece or hook separating them. The bra band may be a single layer or lined.
 | 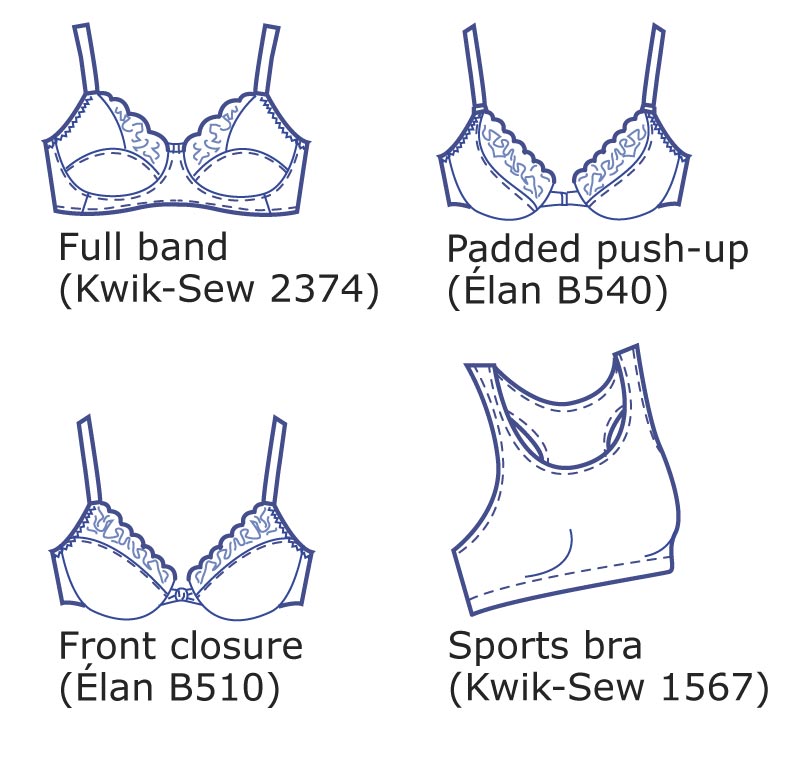 |
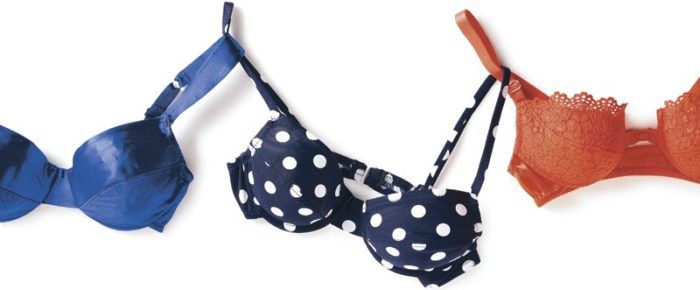
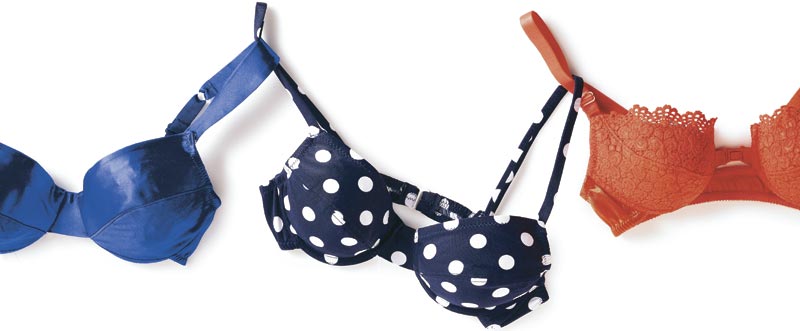
Cups can be made of one, two, or three lined or unlined sections, with two being the most common. Cups may or may not include underwires for shaping. Lace cups are often lined with sheer tricot to add stability and reduce scratchiness. You tin can fifty-fifty add padding to the cups to make a push-up bra like the orange lace one in the photo above.
Straps tin can be made of strap elastic (less stretchy than regular rubberband), nonstretchy strapping, or self-fabric, with or without an adjuster (the most common is a ring-and-slide aligning). Nonstretchy straps usually have some rubberband at the dorsum for ease of movement.
Bras close in either the front or back with hooks, and back closures ordinarily have two or 3 size adjustments. Many sports bras pull on, with no closures at all.
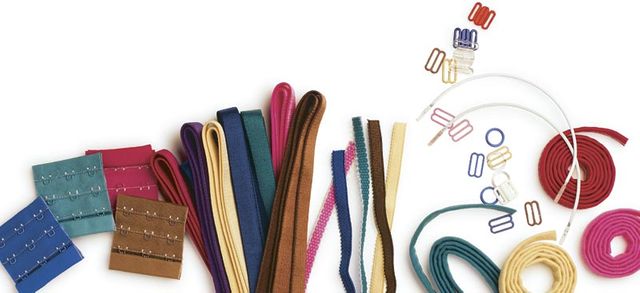
Each of the bra patterns available from Kwik-Sew, Sew together Lovely, and Élan Patterns, fabricated for sizes ranging from 32A to 48FF (see Bra-making sources by mail), will guide yous through the construction for that way. To decide what size to beginning with, see the box below. The pattern volition listing the fabric options, findings, and notions you'll need, similar the plush elastic (cushiony on one side), strap elastic, back hooks, and underwires and their channeling. Or, to make gathering the parts easier, you tin buy a kit with all the fabric and findings y'all'll need; some kits take everything dyed to match.
To wire or not to wire
For maximum shaping and support, an underwire bra is the best choice for most women. The underwire shapes and holds the cup to a fixed bore, which tin benefit fifty-fifty a small-busted woman. Complaints about underwires are due mainly to poorly fitting bras, which tin can cause pinching and poking wires.
Material ideas
Yous'll see bras sewn from a broad diverseness of fabrics, including tricot, lace, stretch satin, cotton/Lycra, and all-cotton knits and wovens. When making bras, you accept the liberty to choose vivid colors, jacquards, polka dots, or plaids, if you similar. I suggest starting with a stretch fabric like two-manner stretch nylon/Lycra satin, which makes fitting easier and forgives small errors.
Taking exact measurements is the showtime stride in making a bra that fits. Y'all'll need to calculate your bra-band size and your cup size past measuring around the rib cage and full bust, wearing your all-time-plumbing fixtures bra. (Big-busted women particularly demand support for accurate measurements.)
Using a full-length mirror, measure effectually the rib muzzle, making sure the tape is level effectually the trunk and pulling it snug. To this measurement, add either 4 or five in. to get an even number. Instance: if the snug rib muzzle is 29 in., add 5 for a total of 34 in. This is the bra-ring size.
Next, measure out the bosom around the fullest function, again keeping the record level, but this time don't pull it snug. To decide the cup size, subtract the bra-band size from the full-bust measurement. The deviation, in inches, tells yous the cup size: one in. for A, ii for B, 3 for C, 4 for D, five for DD (or E), half dozen for DDD (or F), and seven in. for FF. For example, if your bra band is 36 in. and the total bust 38 in., the loving cup size is B; y'all'll make a size 36B. Remember that this is just a starting point. Your bodily bra size may be slightly different
The essential good fit
Let'south look at what constitutes proper fit in a bra, which will help when you're measuring and deciding on your size. A well-fitting bra is comfortably snug effectually the torso, with the breasts filling the cups completely–no excess fabric in the cups, and no breast tissue spilling out of the cup at the superlative, side, or bottom. The bra's center forepart touches, or very most touches, the breastbone. The bra ring doesn't ride upwards in back, and the straps stay in place without slipping or digging into the shoulders. Ideally, the bust level is near halfway between elbow and shoulder, although this may not be practical for a heavy-busted woman.
To check the fit, brand a sample cup with the blueprint and fabric you plan to use, and hold it up to yourself. Information technology should completely cover the breast from the center front to the side, and under the breast to the rib cage, with a little extra all around for seam allowances. Check that the breast fills the cup completely, without jutting at the sides or bottom. Can you pinch any excess fabric at the bust betoken? If so, make a notation of how much and arrange the pattern pieces accordingly. (2 women may have the same rib-cage and total-bosom measurements, still still be dissimilar cup sizes. If yous have a wide, shallow bust, use a larger loving cup size and accept the fullness out of the cup. For a solution to this and other problems, encounter the box below) Now try the cup on the other chest. Many women aren't symmetrical, so it's important to check both sides. If your left side differs noticeably from your right, brand separate blueprint pieces for each side and label them.
Most fitting bug are like shooting fish in a barrel to remedy and oftentimes result from the mismatch of cup and ring size.
Cheque cups first: Cups that are too pocket-size volition need to exist larger (and vice versa). If cups fit correctly but bra ring is likewise tight or loose, irresolute band size will also modify cup size. The C cup on a size 36 is nigh same size as B cup on a 38. And if you become down a band size, you'll get upwardly a cup size.
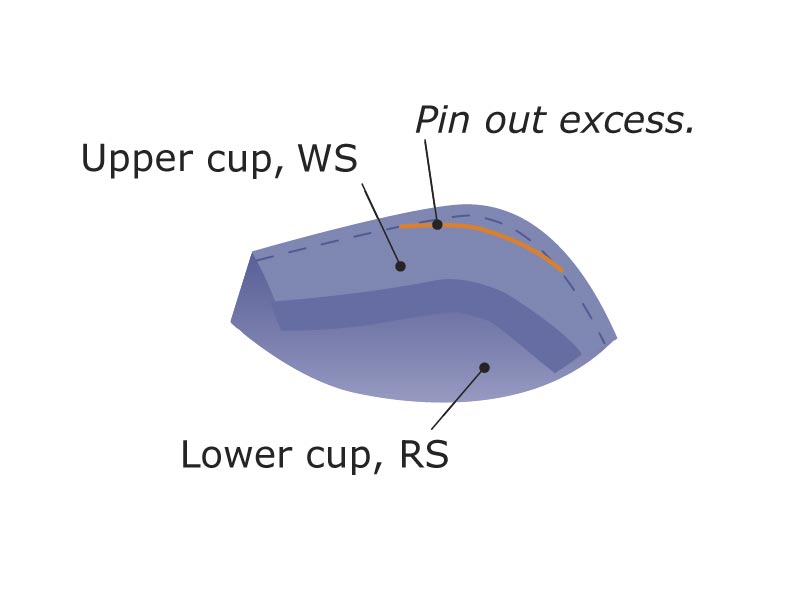
Cup needs reshaping: If cup is as well pocket-sized, you can go to larger loving cup size and reshape tip, if needed, to remove excess fabric. Pin out excess on test cup, as shown above, tapering to zero. Make same changes to pattern.
Bra band rides upwardly in dorsum: Ring is too loose, cups are too small, or both. Try going up a cup size or downwardly a band size. Larger bust needs wider, closer-fitting ring to support weight of bosom.
Straps won't stay on shoulders: May be too loose or set too far apart for narrow or sloping shoulders. Adjust straps to requite some elevator to bust. If yous like, stitch straps to stay in place. (A custom-fitted bra does not really need adaptable straps. Manufacturers utilize them to fit more than women with fewer sizes.) Y'all tin move the straps closer together in dorsum, or choose a unlike pattern.
Straps dig into shoulders: Also indicates loose band or cups that are too small. Wider band and wider, padded straps help.
You can really customize the fit with the aid of a family member or close friend (you'll need four hands). Hold the plumbing equipment loving cup up to yourself and have your helper concord the underwire against the loving cup in the correct position. Trace the entire bottom border of the wire, using a pencil or textile marking. Accept it off and add three/8 in. to the lesser for the channeling and seam assart.
Get prepare to cutting and sew your custom bra
Before you lot begin, read all the instructions for your pattern, put a new size threescore/8 or seventy/10 universal or ballpoint needle in your machine, and brand certain your car is lint-free for practiced run up quality. Test your stitching on a swatch, using a straight stitch of about 12 sts/in. (2.v cm). For Lycra blends, stretch the fabric slightly equally y'all sew to add a little requite to the seam. If your auto skips straight stitches, effort a finer thread in the acme and bobbin, or use a little silicone lubricant like Sewers Assist on the needle and thread spool. If yous still have bug, try another new needle. For skipped zigzag stitches, change to a three-pace zigzag, if you have ane.
When laying the design on the textile, pay special attention to the "grainline" mark. On a pattern designed for knits, this is meant to be placed in the direction of the material's greatest stretch, which may be lengthwise or crosswise, depending on your cloth. Your best layout may differ from the one in the blueprint's instructions.
Because a bra is so fitted, a 1/8-in. cut or sewing error can throw it off a whole loving cup size. I discover a rotary cutter, mat, and weights to be the most accurate cutting tools. To mark dots and notches, make tiny 1/8-in. clips for notches and apply pins to mark dots.
Add support for a big bosom
Large-busted women can add back up to the lower cup to help elevator a heavier bosom. Utilise a double layer of fabric in the lower loving cup or add a light-to-medium-weight interfacing, like a fusible tricot knit. Or use fusible web to join two layers of fabric for the lower cup. You can interface the entire lower cup (excluding the upper seam allowance), or simply the outer bottom portion.
Uncomplicated custom bra assembly
To run up a bra, you'll showtime make the cups and join them to the band, then add elastic, straps, and, finally, a closure. I'll explain a few tips to help you go started on the construction for the basic bra manner, shown in royal bluish.
Run up the cups first
To construct each cup, identify the upper and lower cup pieces correct sides together and pin at each end of the seam and at the dot or notch. Sew with the lower cup against the pharynx plate, stopping often with the needle downwardly to reposition the edges, instead of using lots of pins.
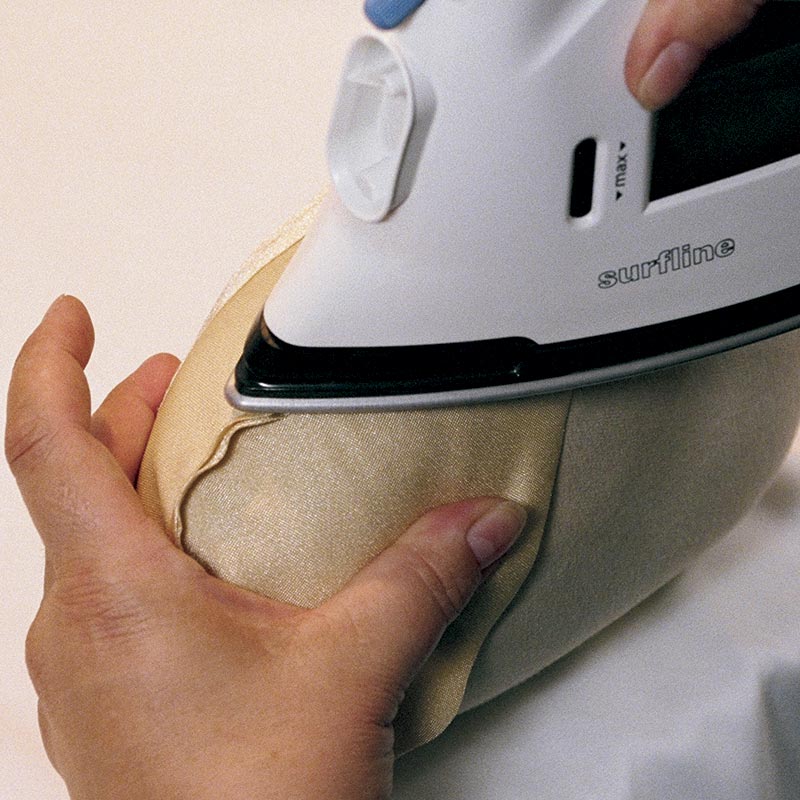
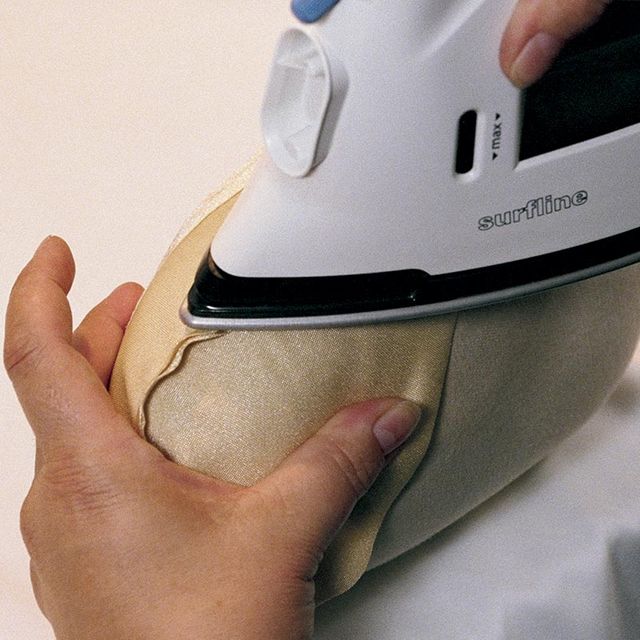
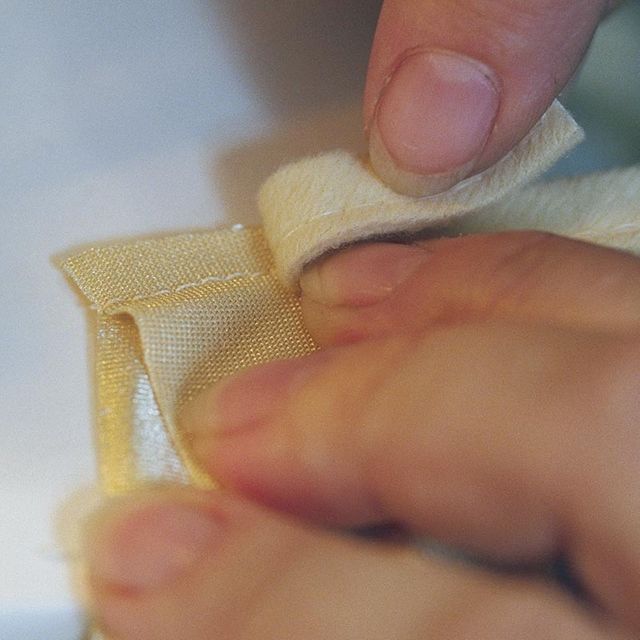
To finish the loving cup seam, you accept several options. You can press the seam to one side (down for a unmarried-layer lower cup; up for a double ane). A tailor'southward ham makes pressing curved seams like shooting fish in a barrel, equally shown in photograph ane below; brand tiny clips in the seam allowance, if needed, so it lies flat. So peak sew 1/8 in. from the seam, through the seam assart, as shown in photo ii, and trim it close to the stitching. Or y'all can printing the seam assart open up and topstitch on each side of the seam, and so trim.
 |  |
Another choice frequently used past bra manufacturers gives a soft, nonscratchy finish. Press the seam open and center a 1/two-in.-broad lengthwise strip of sheer nylon tricot, Seams Great, or soft lace over the seam and sew one/8 in. from the seam on each side.
Add together elastic to the ring
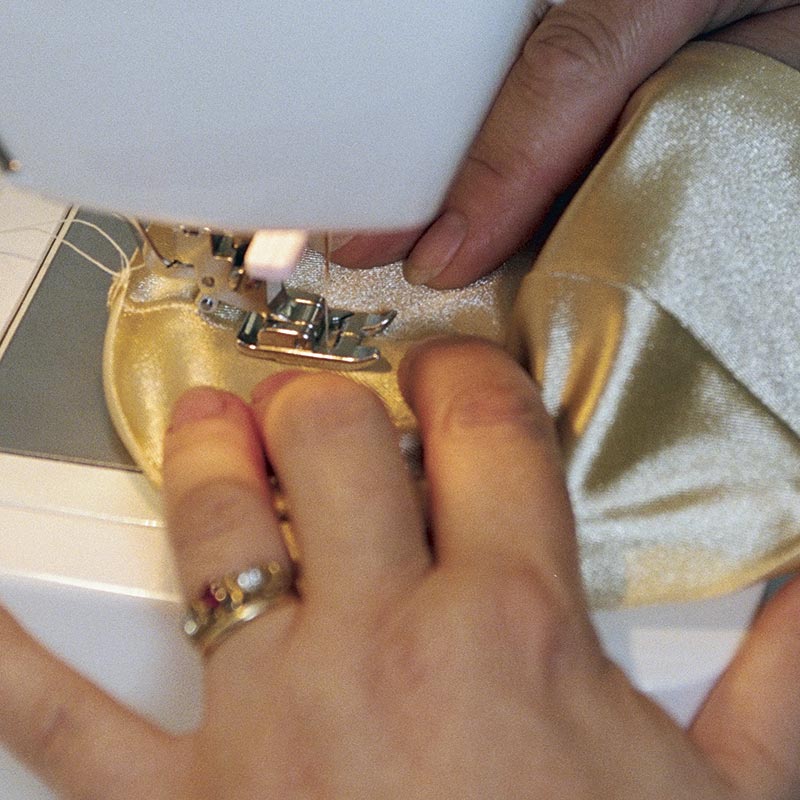
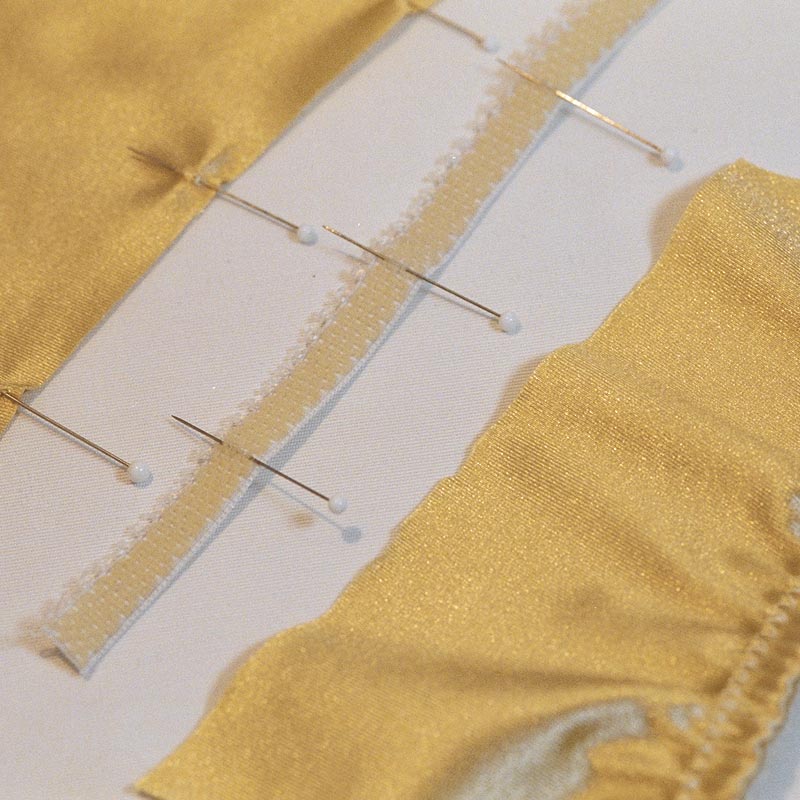
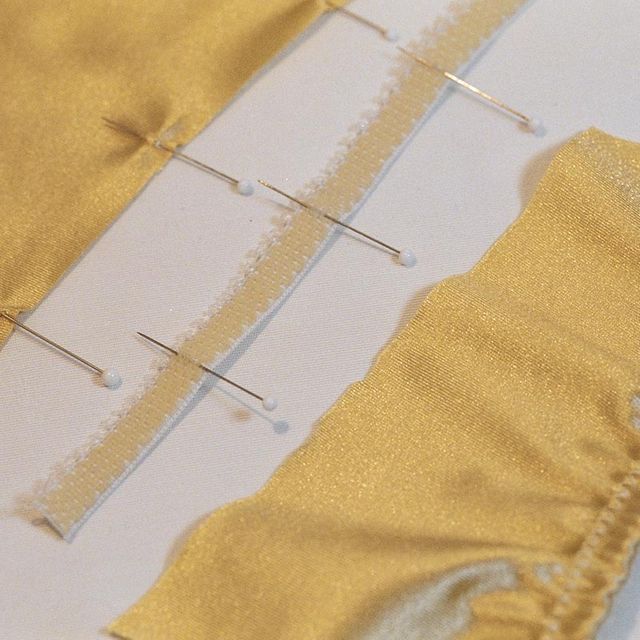
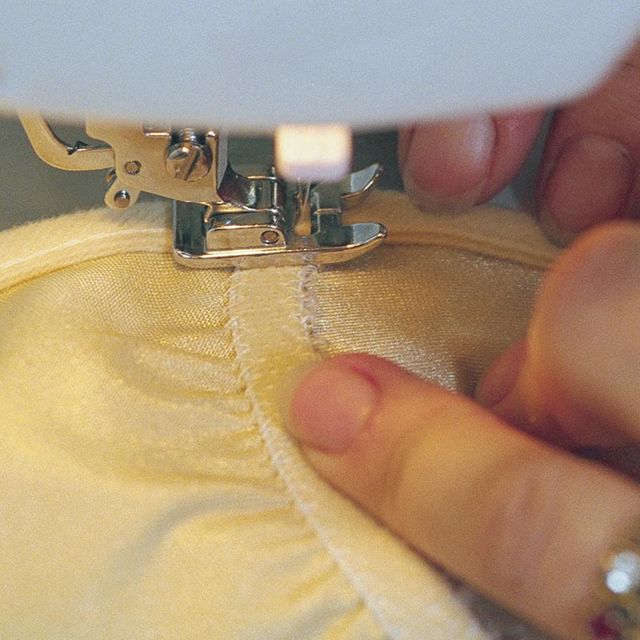
The rubberband that finishes the band edges is usually cut shorter than the band and stretched slightly to fit during stitching. Information technology helps to fold and marker the pattern slice and elastic in quarters, every bit shown in photo 3. When you sew together the showtime line of stitching forth the picot edge, the left swing of the narrow zigzag should simply affect the border of the elastic (photograph 4). After trimming close to the stitching, turn the elastic to the within and zigzag again along the direct edge, stretching the elastic as you lot sew. Or use a wide, three-step zigzag to sew together downward the center of the rubberband.
 |  |
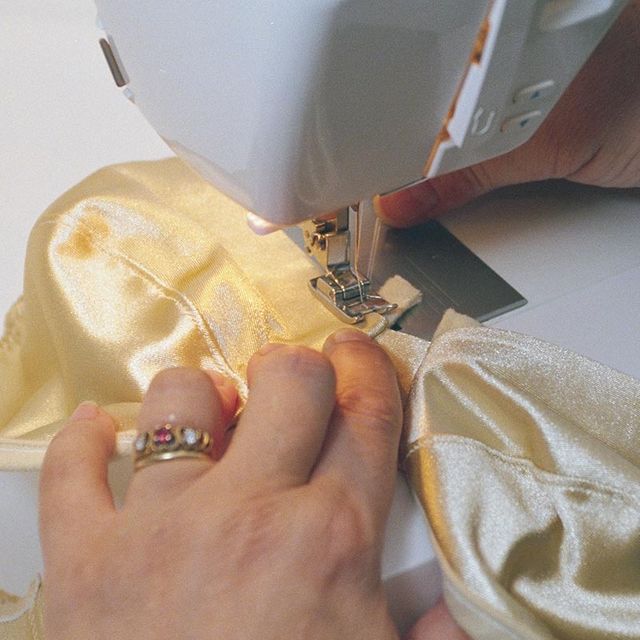
When you adhere the band to the exterior edge of the loving cup, continue stitching around to the centre front. This stitching will serve as a guide when you apply the channeling to concur the underwire.
Comfy channeling
The nicest ready-fabricated channeling for underwire consists of several layers, and provides lots of cushioning. Or you tin can brand your own, if you like, with a finished width of 3/8 in. Two layers of bias-cutting cotton flannel inside a layer of the bra fabric makes comfortable channeling.
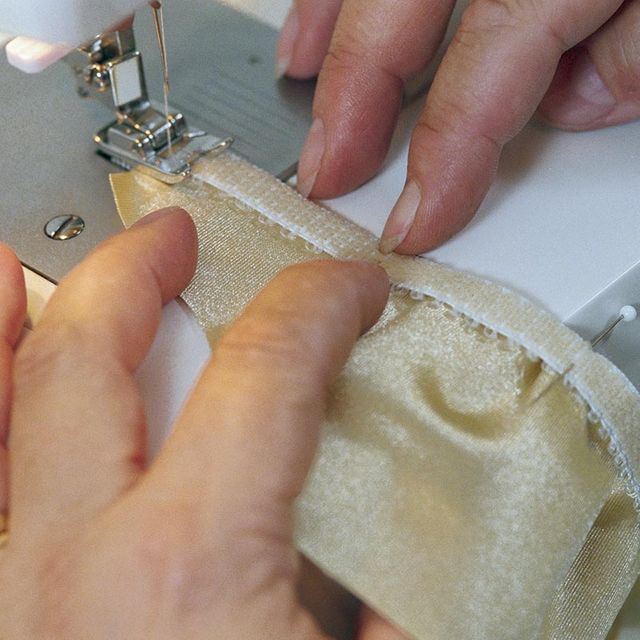
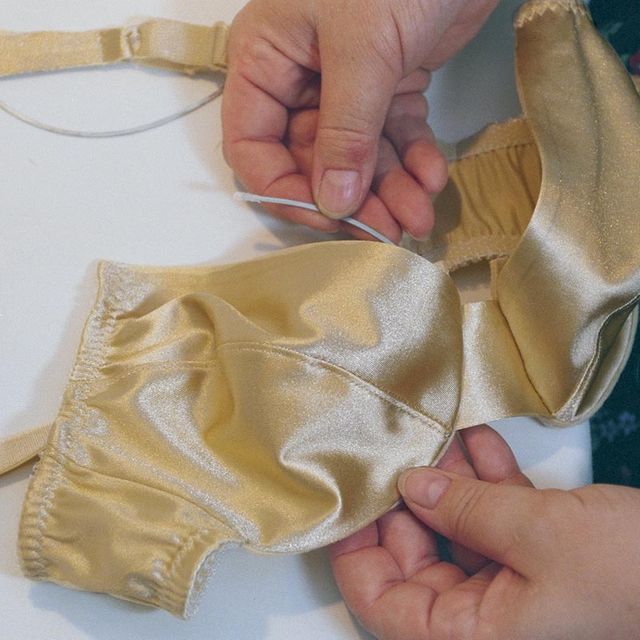
To add the channeling, lay one bra cup right side up on the table, fold the bra ring and other half of the bra out of the way on top, and align the stitching on the channeling with the stitching guide on the cup, as shown in photo 5. Pin, roofing the side seam, lower loving cup, and eye-front seam, and leaving at to the lowest degree ane/two in. of channeling at each finish. Stitch close to the inner edge of the channeling (photo half-dozen), pulling the channeling snug as y'all stitch, which helps it scroll to the inside. An option, after pressing, is to stitch shut to each long edge of the channeling to prevent it from rolling to the exterior, which gives a topstitched wait.
 |  |
Be very conscientious when you lot sew the underwires into the channeling (photograph 7) — stitching over the wire may result in a broken needle and possible eye injury. With the wires fully inserted, you lot should have at to the lowest degree three/4 in. of space between the terminate of the wire and the centre-front edge of the bra. On the correct side, sew a line of very narrow satin stitches at the center front of the upper loving cup, 1/eight in. from the height edge, as shown in photo 8, and trim the channeling even with the cup'southward upper border. Or you tin turn the channeling under before sewing.
 |  |
From bra to swimwear
In one case you successfully consummate a bra you similar, it's easy to make a few adjustments to get a perfect-fitting swimwear top, like the polka-dot ane. You'll demand to lengthen each dorsum ring about 2 in., smooth the shape of the upper band, and merchandise the bra hooks for a swimwear slide closure. Add together swimwear lining to the cups, and substitute 3/eight-in.-wide swimwear rubberband for the plush, cutting it to xc per centum of the band measurement. Sew together the elastic inside the edges of the band, then turn and zigzag again, so the rubberband is enclosed. And replace the strap elastic with a narrow, self-fabric tube with a strip of elastic inside.
I call up y'all'll find that making your own custom bra opens upwards an exciting new era of personal underwear fashion. What accept you got to lose, except that frustrating feeling of being a way victim?
For more on sewing a custom bra, check out these articles:
- How to Turn Set-made Bras into Strapless Clothes Support
- Adapt a Bra to Conform a Prosthesis
- How to Install Bathing Accommodate Bra Cups
- Sue and Emma Folts of BraBuilders.com | Episode 42
- Pattern Roundup: Keen Bra Making Patterns
Cynthia Elam of El Cajon, CA, teaches bra making and designs bra patterns and kits nether the name Élan Patterns. For more on bra construction, cheque out Beverly Johnson's article, "Clone a Favorite Bra," in the February/March 2002 outcome of Threads (#99).
Photos: Scott Phillips; drawings: Robert LaPointe


Get the latest including tips, techniques and special offers directly to your inbox.

Source: https://www.threadsmagazine.com/2008/10/29/the-bra-dilemma-solved
Posted by: vallejopostra.blogspot.com
0 Response to "How To Put Bra Cups In A Dress"
Post a Comment